This article is intended to explain you step by step to create a WPF Application. Creating a WPF application is as easy as the creation of other application types in Visual Studio. This walkthrough is based on Visual Studio 2013 edition.
Excercise 1: Create a new WPF Application project
On the menu bar, choose File, New, and then Project… It will open the below screen-
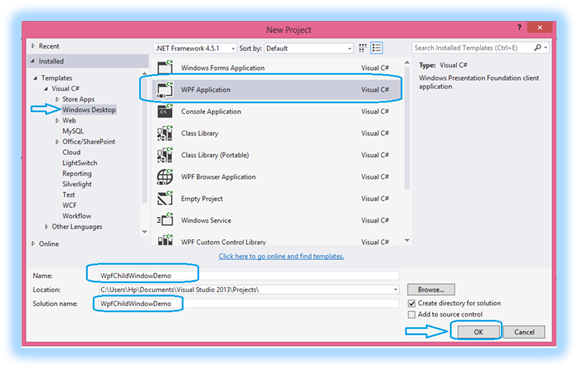
In this screen, for our sample application, we are choosing-
- Language of template
Visual C# from Templates – If you want to use another language then, expand the “Other Languages”. From there you can choose other languages like VB.net and so on.
- Template group
Windows Desktop
- Template
WPF Application
We can give a name to our solution, project name, and also choose location where this will be stored. You may have notice that there is a checked checkbox “Create directory for solution”, which automatically create a directory for us.
If we are creating a solution which will be mapped with code repositories like SVN or TFS then we can tick/check “Add to source control” checkbox. It will then facilitate us to easily map solution with our repository server.
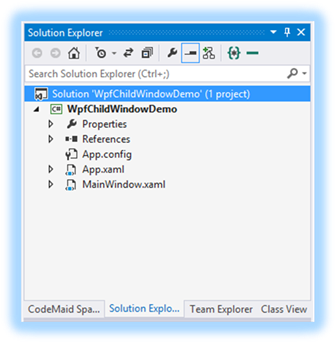
After choosing correct template and giving project name, solution name, location, Click on OK button. Visual Studio creates the “WpfChildWindowDemo” project and solution, and the Solution Explorer shows the various files (refer below)-
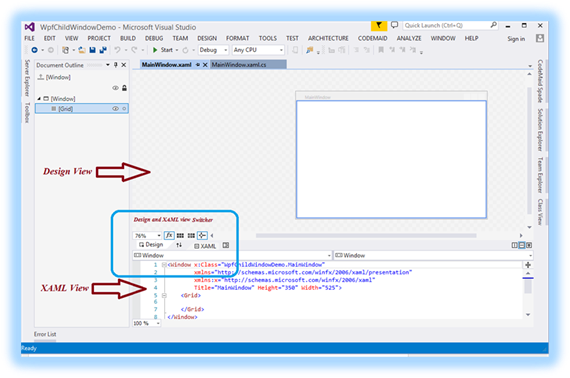
And the WPF Designer shows a design view & XAML view of MainWindow.xaml in split view. We can slide the splitter to show more or less of either view. Even we can choose to see only one view i.e. only design/visual view or only XAML view. Refer below picture-
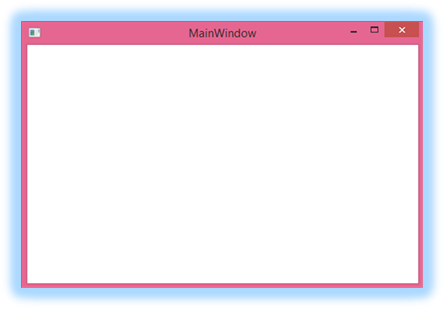
Excercise 2: Run the WPF Application
Before we make some changes, let’s see the default template in action J by running the application. If we run it now, it will looks like as –
Excercise 3: Change the Application Icon
Lets’ make a small changes to make our learning interesting, Okay? So, we will change the current application icon with a nice one in simple manner. The easiest way is add a logo image into our project, and then assign that to the “Icon” properties of Window.
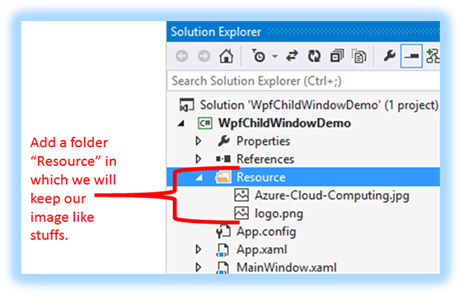
Let’s add a folder in our WpfChildWindowDemo project and name it “Resource”. Inside this folder add 2 image files. Now, our Solution Explorer will have items as looks in below image-
Now, in the XAML viewer, inside the <Window> tag, assign the image to Icon properties. As soon as start typing, Visual Studio intelli-sense will start showing you the matching items. Refer below image-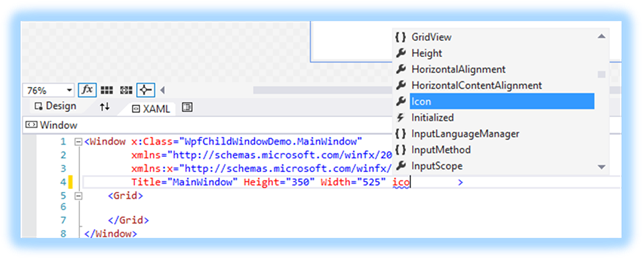
In our example, let’s pick logo.png from Resource folder and assign it to Icon properties-

The same can be done from the Properties window. Select the Window item and go to the Properties window. Make sure Type is Window (refer red underlined with arrow mark in below image). 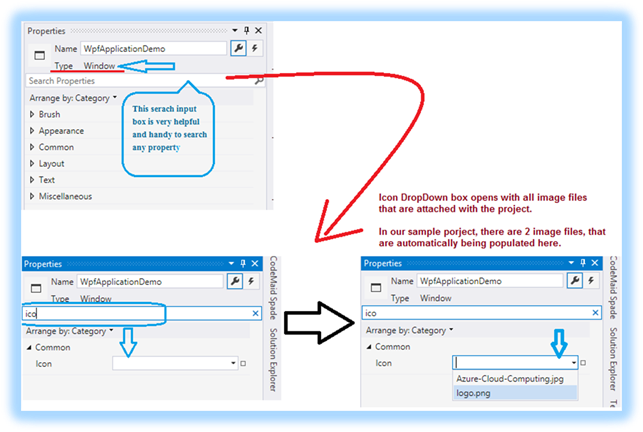
The Icon dropdown (see above image), all images associated with our Project has been popup automatically. From here, we can choose the desired image file for the application icon. Visual Studio automatically update our XAML file with Icon="Resource/logo.png", the same thing as we did in preceding approach.
Let’s hit the run button, and see the application. Now, it is showing the application icon, see the below image-

In next post, we will learn how to create a Child Window in WPF Application.
Twitter: @AnilAwadh